Snacks We Make Together: Easy Kitchen Wins With a Little Helper

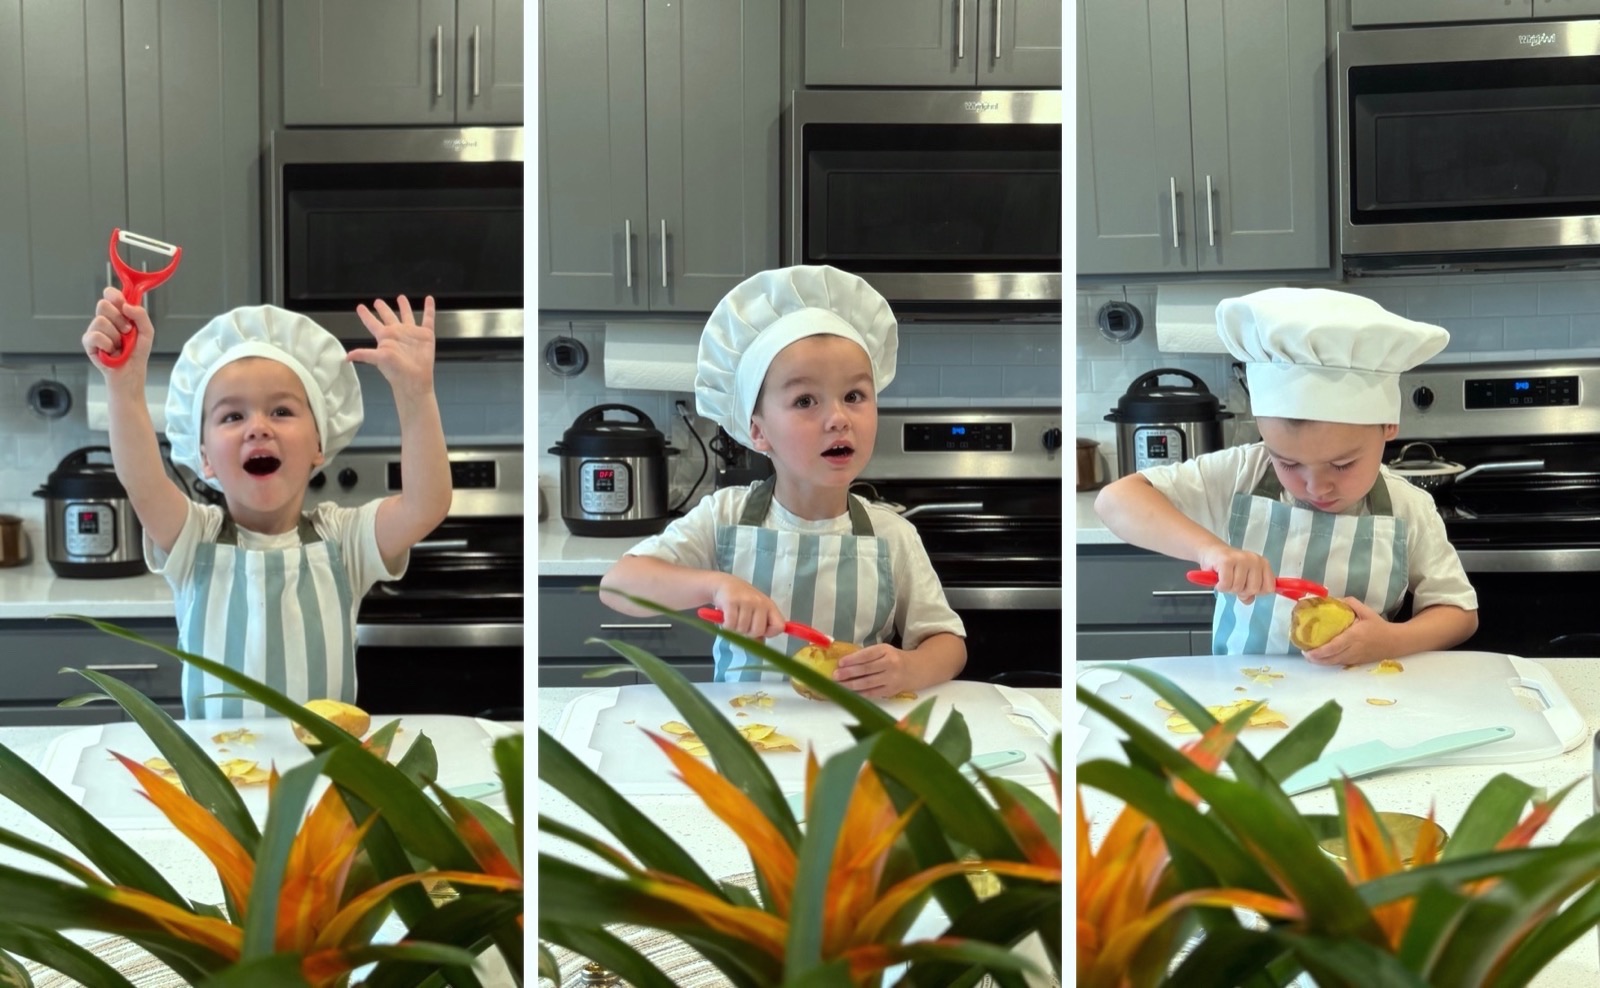
Cooking with a 4-year-old doesn't have to end in tears or flour on the ceiling—these four easy, no-bake recipes build real life skills while keeping the chaos completely under control.
On this page
Okay so… hear me out. If you had told me two years ago that I would voluntarily invite my child into the kitchen to help me prepare actual, edible food, I would have laughed so hard I’d have spilled my cold brew all over my oversized sweatshirt.
Back then, the thought of cooking with a toddler triggered a very specific kind of mom-panic. You know the one: visions of cracked eggshells in the bowl, a light dusting of flour coating every square inch of the kitchen island, and a melted breakdown (from both of us) before the oven even finished preheating.
Fast forward to right now. My son Luke is officially a spirited, hilarious 4-year-old. He’s at that magical age where he wants to do everything himself—from buckling his own car seat to helping Hubs pack up his fishing rod for a Saturday morning on the river. And while I am still a chronic product-tester who likes an organized counter, I’ve found a secret rhythm that makes kitchen time with a 4-year-old not just tolerable, but genuinely fun.
Listen… the key isn’t turning your child into a line cook. The key is picking zero-bake, low-mess, high-reward snacks that give small hands something meaningful to do without requiring you to scrape baked-on cheese off the backsplash later.
When we pull up Luke’s learning tower to the island, we aren’t making beef bourguignon. We are making bite-sized, high-protein, colorful snacks that he can take full ownership of. It builds his confidence, teaches him real life skills, keeps him busy on a chilly afternoon in Colorado when it’s too cold to play outside, and—miracle of miracles—he actually eats the food because he made it himself.
So grab your iced coffee, pop in your air-fryer liner (just kidding, we aren’t even turning the air fryer on today, though you know I love it), and let’s talk about four easy, low-mess kitchen wins you can pull off with your little helper this week.
Why Should You Let a 4-Year-Old Near Your Kitchen Counter?
I get it. It’s always faster to just make the snack yourself. If you’re rushing to get out the door for preschool pick-up or trying to squeeze in a work call, by all means, hand them a string cheese and keep moving. No judgment here.
But when you have a spare twenty minutes, inviting your 4-year-old into the kitchen serves a huge purpose:
- Fine Motor Coordination: Scooping, rolling, spreading, and pressing are basically sensory play disguised as snack prep. It strengthens the little muscles in their hands that they need for writing, zip-tying jackets, and tying shoes.
- Math and Vocabulary in Real Life: Counting raisins, learning the difference between “a scoop” and “a pinch,” and discussing colors and textures build early learning concepts without a single flashcard.
- The “Picky Eater” Cheat Code: If my 4-year-old sees a piece of celery on a plate, he might act like I offered him a stick from the backyard — same story with every vegetable in this house. But if he smeared the peanut butter on that celery and lined up the raisins himself? Suddenly, he’s a culinary enthusiast devouring his masterpiece.
- Genuine Confidence: Watching Luke swell with pride when he hands Hubs a snack he made “all by myself” is worth every single rogue oat on the floor.
But if you ask Luke, the answer is cake
I could put four beautiful wholesome snack recipes in front of him and he would still tell you the correct answer is cake.
And honestly? Cake is the best one on this whole list for a kid this age, for reasons that have nothing to do with the cake.
The steps are big and obvious. Crack, pour, stir, scrape. A 4-year-old can genuinely do most of it, and can see himself doing it. Yogurt bark is lovely but it is mostly waiting; cake is doing.
It is forgiving. Extra stirring does not ruin it. A slightly clumsy egg crack does not ruin it. That matters when the whole point is letting him do it badly on purpose.
There is a payoff he understands. He watched it go in, he watched it rise, and then he gets a piece. The line from effort to reward is short and completely legible to a small person.
And the licking of the spoon is non-negotiable, which he considers to be the actual reason cake exists.
If you are just starting to cook with your kid and you want the thing most likely to end in a kid who wants to do it again — start with a cake. The snack recipes below are what we make on a regular Tuesday. Cake is what he asks for.
What Are the Golden Rules for Low-Mess Kitchen Bonding?
Before we jump into the recipes, let’s lay down some ground rules that keep mama’s heart rate at a nice, steady resting pace.
- Rule 1: Embrace “Mise en Place” (Prep Before You Call Them Over): Do not bring a 4-year-old to the counter while you are still hunting through the pantry for ingredients. Measure out the sticky or messy stuff beforehand into small, unbreakable bowls. They get to dump; you get to control the volume.
- Rule 2: Invest in Kid-Safe Tools: Get a set of nylon kid-safe knives, a mini silicone spatula, and a small cookie scoop. Giving them real, functional tools scaled to their hand size makes them feel like a grown-up and prevents frustration.
- Rule 3: Work on a Bordered Sheet Pan or Silicone Mat: Put your bowls and prep station inside a rimmed baking sheet lined with a silicone mat. When Luke drops an oat or spills a blueberry, it hits the pan instead of bouncing onto the hardwood floor.
- Rule 4: Keep a Damp Microfiber Cloth Nearby: Don’t wait until the end to clean up. Wipe hands as you go so sticky fingers don’t end up on your cabinet handles.
Now that we have set ourselves up for victory, here are four that work. I want to be straight with you: these are not old family recipes handed down to me — they are the kind of thing I make, and the kind of thing that survives a 4-year-old helper, which is the actual requirement here.
How Do You Make Monster Energy Bites with a 4-Year-Old?
Energy bites are the holy grail of toddler kitchen projects. They require zero heat, zero sharp knives, and they taste like cookie dough while secretly delivering fiber, healthy fats, and protein. My 4-year-old calls these “power balls” and insists they help him run faster on the playground.
Ingredients:
- 1 ½ cups old-fashioned rolled oats
- ⅔ cup creamy peanut butter (or sunflower seed butter for a nut-free option)
- ⅓ cup honey or pure maple syrup
- ½ cup ground flaxseed meal or chia seeds
- 1 teaspoon pure vanilla extract
- ⅓ cup mini chocolate chips or mini M&Ms (the “monster” element)
- Pinch of sea salt
Step-by-Step for Mama and Helper:
- The Dump: Line up all your pre-measured bowls. Hand them to your 4-year-old one by one and let them dump the oats, flaxseed meal, peanut butter, honey, vanilla, and salt into a large mixing bowl.
- The Stir: Give your little one a sturdy wooden spoon or silicone spatula. Let them stir until the mixture starts coming together. (Mama might need to step in for the final heavy-duty mix, as cold peanut butter takes some muscle!)
- The Mix-In: Let your child dump in the mini chocolate chips or M&Ms and gently fold them into the dough.
- The Roll: This is the absolute best part for a 4-year-old. Grab a mini cookie scoop—my absolute favorite gadget for this step—scoop out a portion, and drop it into your child’s hands. Show them how to roll it between their palms into a ball. Place the balls on a parchment-lined tray.
- The Chill: Pop the tray into the fridge for 30 minutes to firm up. Transfer to an airtight container.
Mama Tip: If the dough feels too sticky to roll, toss the bowl in the fridge for 10 minutes first. It makes rolling way easier for tiny hands!
Can You Really Make Berry Swirl Yogurt Bark Without Losing Your Sanity?
Yogurt bark is basically an ice cream bar’s cooler, healthier cousin. It is bright, cold, customizable, and visually stunning. Plus, spreading yogurt across a pan is deeply satisfying for a preschooler.
Ingredients:
- 2 cups plain or vanilla full-fat Greek yogurt (Greek yogurt is thicker, which prevents it from turning icy)
- 2 tablespoons honey or maple syrup (omit if using sweetened yogurt)
- ½ cup fresh strawberries, finely diced (use a kid-safe nylon knife!)
- ½ cup fresh blueberries or raspberries
- 2 tablespoons freeze-dried fruit powder or chia seeds for sprinkling
- Optional: 2 tablespoons mini chocolate chips or sliced almonds
Step-by-Step for Mama and Helper:
- The Base Mix: In a medium bowl, let your helper stir the Greek yogurt and honey together until smooth.
- The Spread: Line a 9x13-inch rimmed baking sheet with parchment paper. Pour the yogurt into the center and let your 4-year-old use an offset spatula or the back of a spoon to spread the yogurt out into an even layer, about ¼-inch thick. It doesn’t need to be perfect!
- The Decoration: Hand your child the berries and toppings. Let them press the fruit into the yogurt layer. Luke loves making patterns or making little “fruit faces.”
- The Freeze: Place the baking sheet flat in your freezer for at least 2 to 3 hours, until completely solid.
- The Snap: Once frozen, pull the bark out using the parchment paper edges. Let your child help you snap the bark into irregular, fun pieces.
Store the bark in a freezer-safe bag. It’s an amazing, refreshing treat after a busy afternoon running around the park.
What Is the Modern Twist on Classic Ants-on-a-Log?
We all grew up on classic ants-on-a-log—celery, peanut butter, raisins. But let’s be honest: standard celery can be stringy and tough for little teeth, and raisins can get boring. We love doing “Upgraded Snack Logs” using three different bases and fun, colorful toppings.
Ingredients & Base Options:
- The Logs: Celery sticks (pith removed), banana halves (cut lengthwise), or thick apple slices. Luke does not like apple. I still put it out sometimes, because kids change their minds and the only way to find out is to keep quietly offering it with zero pressure. Some weeks he ignores it. One week he might not.
- The Spread: Creamy peanut butter, almond butter, sunflower seed butter, or cream cheese.
- The “Ants” (Pick 3-4):
- Raisins or dried cranberries (“Classic Ants”)
- Pomegranate seeds (“Ruby Ants”)
- Mini chocolate chips (“Fancy Ants”)
- Goldfish crackers or animal crackers (“Fish on a Log”)
- Blueberries (“Big Ants”)
Step-by-Step for Mama and Helper:
- Prep the Logs: Cut celery, bananas, or apples into 3-4 inch sections.
- The Spreading: Give your 4-year-old a child-safe silicone butter knife or small spatula. Show them how to scoop the spread and smear it into the groove of the celery, or onto the flat side of a banana/apple slice. (If celery is too hard for them to spread into, stick to banana halves—it’s super forgiving!).
- Placing the Ants: Set out small bowls of your chosen “ants.” Let your child use their thumb and forefinger (pincer grasp practice!) to line up the toppings along the log.
- Serve Immediately: No waiting required. These are instant gratification at its finest.
How Do Fruit Kabobs Turn Snack Time into Fine Motor Skill Practice?
There is something inherently magical to a 4-year-old about eating food off a stick. If you put a bowl of melon chunks on the table, Luke might eat two pieces. Put those same chunks on a colorful straw or wooden skewer, and suddenly it’s a gourmet party snack.
To keep this safe and totally age-appropriate, we skip sharp wooden skewers and use heavy-duty paper straws or wooden skewers with the sharp tip snipped off with kitchen shears.
Ingredients:
- 1 cup strawberries (hulled and cut in half)
- 1 cup melon chunks (watermelon, cantaloupe, or honeydew)
- 1 cup seedless green or red grapes
- 1 large banana, cut into thick coins
- 1 cup fresh pineapple chunks
For the Honey-Vanilla Dip:
- ½ cup Greek yogurt (vanilla or plain)
- 1 tablespoon honey
- ¼ teaspoon cinnamon
Step-by-Step for Mama and Helper:
- Make the Dip: Let your 4-year-old whisk the Greek yogurt, honey, and cinnamon together in a small dip bowl using a mini whisk. Set aside.
- Thread the Fruit: Demonstrate how to hold a paper straw in one hand, push a piece of fruit onto the top, and slide it down. Let your helper take over!
- Pattern Play: Encourage them to create patterns: Strawberry, banana, grape, repeat! This turns snack time into a stealth math lesson without them even noticing.
- Arrange and Dip: Lay the finished kabobs on a platter alongside the yogurt dip.
Listen… these fruit kabobs are also my secret weapon when we have friends over for playdates. They look impressive, take five minutes, and keep the kids busy at the table for an solid ten minutes while the moms actually finish a sentence!
Frequently asked questions
What do I do if my 4-year-old wants to eat all the ingredients while making the snack?
Expect it! A little grazing is totally normal and part of the sensory experience. I give Luke his own “tasting bowl” with a few pieces of chocolate chips or fruit chunks that are his to eat whenever he wants during prep. That way, he knows the main mixing bowl is for making the recipe, and his small bowl is for snacking.
How do I handle the mess without losing my temper?
Two things: mental recalibration and physical boundaries. Accept before you start that there will be a few crumbs or a sticky drip. It’s guaranteed! Using a deep-rimmed baking sheet or silicone craft mat keeps 90% of the mess contained to a single surface you can rinse off in the sink. And remember, damp microfiber towels are your best friend!
What are the best kid-safe kitchen tools to buy first?
You don’t need a massive set. Start with three basics:
- A set of kid-safe nylon serrated knives (they cut soft fruit and cheese easily, but won’t cut skin).
- A mini silicone cookie scoop (perfect for energy bites, meatball prep, and muffin batter).
- A sturdy toddler tower or safe step stool so they are at comfortable counter height without wobbling.
How do I get my picky eater to actually try new ingredients during these snack builds?
Zero pressure is the golden rule. Don’t insist they eat it. Just invite them to interact with the food: touch it, smell it, place it on the board, or use a cutter on it. When kids explore food without the pressure of having to swallow it, their anxiety around new textures drops dramatically. Nine times out of ten, curiosity wins and they’ll take a tiny bite on their own terms!
Affiliate link — if you sign up or buy through it, My Mama Mode may earn a small commission at no extra cost to you. As an Amazon Associate, My Mama Mode earns from qualifying purchases. My Mama Mode also participates in other retailer affiliate programs. Learn more.
Frequently asked
The key is using full-fat Greek yogurt rather than regular yogurt. Greek yogurt is naturally much thicker, which stops it from turning icy when it sets in the freezer. That simple swap keeps the texture creamy and super satisfying for your little helper.
Skip the sharp wooden skewers completely so you do not have to worry about poke hazards. Heavy-duty paper straws work like a charm for tiny hands threading fruit. If you only have wooden skewers on hand, just snip the sharp tip off with kitchen shears before handing them over to your child.
If your mixture is sticking to hands, it just needs a quick cool-down session. Pop the mixing bowl into the fridge for about 10 minutes before you start rolling. Chilling the dough firms it up and makes it so much easier for tiny hands to roll into balls.
Tap the one that fits, mama — no comment box, no pressure ✦
Keep reading, mama
20-Minute Scratch Snack Bars That Actually Hold Up in a 4-Year-Old's Lunchbox
Ditch the boxed store-bought junk! These easy, 20-minute scratch-baked snack bars are lunchbox-approved, nut-free friendly, and made with real pantry food.
Scratch High-Protein Pancakes That Keep My Wild Kindergartner Full Until Lunch
Ditch the processed boxed mix! Learn how to make fast, delicious, high-protein scratch pancakes that fuel active kids through busy school mornings.
Make-Ahead Freezer Meals That Save Our Busy Colorado Weeks
Make-ahead Italian freezer meals from scratch — lasagna, chicken piccata, braciole and meatballs — plus the batch prep system behind them.